

Rooting Hair and Eyelashes
Rooting by S. Sullivan
I gave a quick class on rooting in a hotel room after my last Secrist Teacher’s class. One of the ladies was kind enough to photograph the process. The photos aren’t all the absolute best, but this may be helpful.
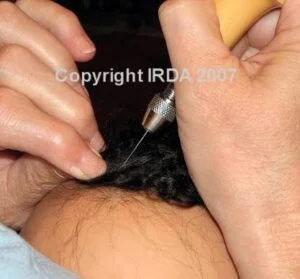
I used a German 42G forked needle and curly black kid mohair cut to about 4 inches long.
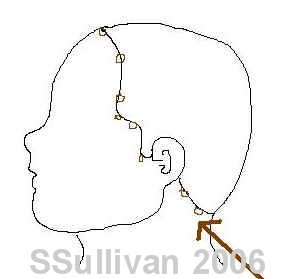
First, I mark the hairline all the way around the doll’s head with a faint series of tiny lines or dots using a colored pencil in the approximate color I will be rooting in.
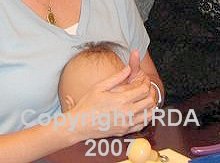
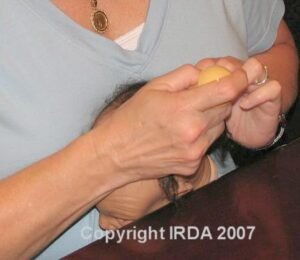
This is how I hold the head. I use my chest and press the doll’s head up against a table to stabilize the head and keep it from moving while I root.
I usually use a heated rice-filled sock to warm the head and make rooting quicker.
I pick up a 1 inch wide strand of mohair. I trim it to about twice the length I want the hair to end up as. Each needle poke will fold most hairs in half as I root. You can also root from one end of the strand of mohair too, and you will likely get one long hair per poke using a fine needle.
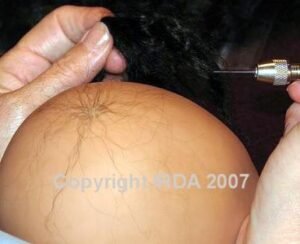
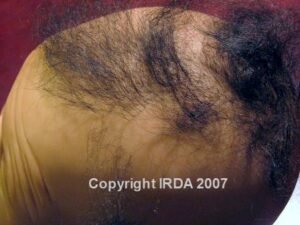
Beginning at the crown, I carefully root in a spiral pattern, tightly setting each hair next to the last one – like this:

Once you get a small, tight spiral about 1/2 inch across, you begin to work outward from that spiral in a curving arc away from the crown like this:
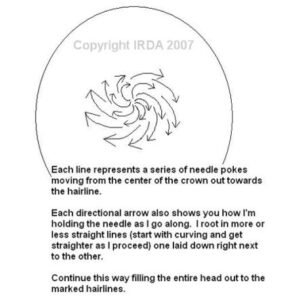
The arrows show the arcing direction that I am moving the needle in as I push into the vinyl through the hair.
After I make about 5-6 pokes through the mohair, I pull the strand away and see how my work is progressing.
Notice I’m holding the needle at an angle, always pointing back towards the crown. The steeper the angle, the better the hair will lay down on the head.
I keep turning the head in the same clockwise motion as I work.
I just move the strand of mohair along the same path I’m rooting and keep gong through it til it all disappears (is rooted, I mean!)
Now I’m moving into straighter lines. I still turn the head as I go so that I always point the needle more or less towards the crown. Now as I get about 2-3 inches away from the completed crown area, I start rooting in straight lines down toward the hairline.
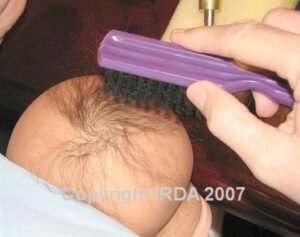
I stop and brush the hair directionally every few minutes. This does two things: makes sure no hairs are double-rooted, and also allows me to see any spaces I’ve missed and how thickly I’m actually rooting.
Still working at a tight angle to the head. Tighter yet as I get to the front hairline so the hairs lay really flat against the head at the most visible point.
The dotted line at the forehead represents the penciled in hairline.
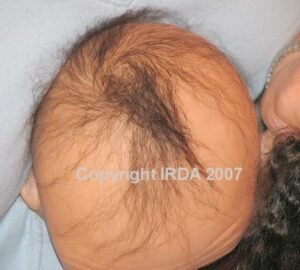
I root in lines away from the crown, filling in between each line as I go til it’s as full as I like it. Eventually you don’t see any lines – just hair evenly spaced.

Here you can see one of the lines I do as I go down the hairline.

Working the other side of the head, left hairline.
I just continue to fill in the entire head all the way around to the back.
Bonus Section – Rooting Eyelashes on Sleeping Baby
I use a 40G 6 barb needle to root lashes. No holder. I also use the straightest mohair I can find that is in the color range as that used on the head. It can be darker, lashes usually are.
I cut off a piece of mohair about 3 inches long and use a strand about 1/2 inch wide.
I don’t use the mushroom handle because the chuck part can damage the cheek of the doll. I am using a 40G 6 barb needle here.
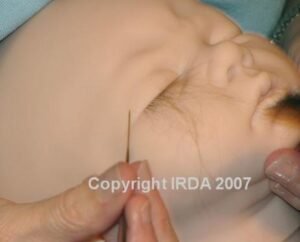
I lay the head with the top of the head against my chest again, the chin pointing away from me.
Come upwards into the bottom part of the upper lid with the point of the needle, going through the hair. The diagram below shows the direction I root each lash in. Notice I root at a slight angle at each of the corners.
Finished. Pull out any excess with tweezers.
Use small scissors and follow the line under the eye to make the first trim on the lashes. I trim them about 1/2 inch at first.
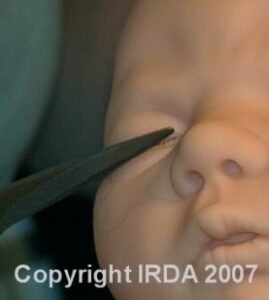
Then I go back and trim off more in really tiny uneven snips by cutting into the lashes (perpendicular to the lash). We didn’t get a photo of this.